Lab Intro
The purpose of Lab 8 is to combine all the different functions we've developed across the previous labs. Task B was selected for this lab, where the robot car would drive fast forward towards a wall and initiate a 180° turn after reaching a certain threshold. In order to reliably accomplish this feat, we would need to make use of our linear and orientation PID controls.
Bluetooth Communication
Following the design philosophy of the previous labs, a new Bluetooth command was added that would essentially set high a flag that would inform the main loop to continuously run a helper function to perform the command. This nonblocking methodology is essential for completing the lab as we would be using a finite state machine to have the robot seamlessly go through several movement phases and complete the drift stunt.
In order to minimize the amount of times we would need to reflash code to the car, the command was configured such that we could alter the PID values for the orientation control everytime we send a command in addition to various other parameters. This would allow us to easily tinker with the values to ensure to find the sweet spot where the car could consistently drift and do an 180 degree turn. Once the command was received, the Arduino code would change the current state in the FSM from STUNT_IDLE to STUNT_ACCELERATE, which effectively acts as our flag for the main loop to run the drift stunt helper function.
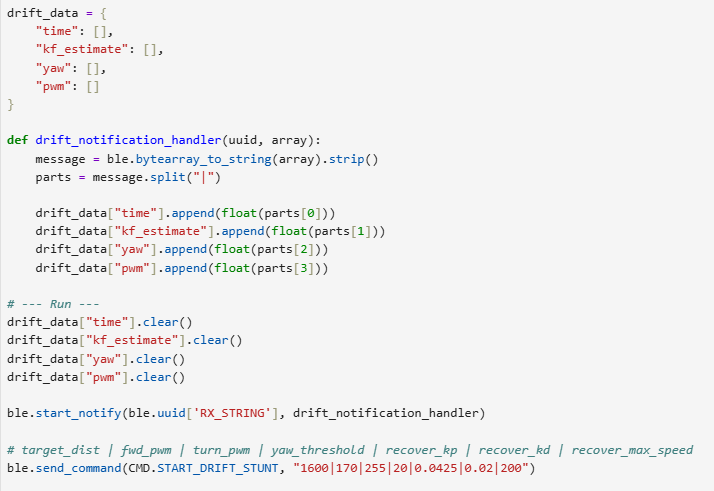 Command on Python side used to trigger the drift stunt.
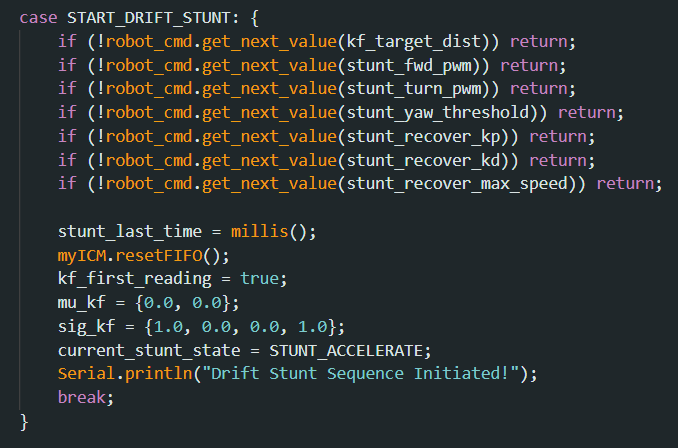 New Bluetooth command on Arduino side.
Initial Acceleration
Once the robot receives the go ahead, it will begin continuously looping run_drift_stunt in the main loop, which is where our FSM controlling the different phases of the drift stunt is located. The vast majority of the code used in this lab was essentially plucked from the previous labs, including the initial phase where the robot accelerates towards the wall. In this phase, we make use of the front-facing ToF sensor as before, integrating the same Kalman Filter that we had developed in the previous lab. This would be helpful since we aimed to increase the linear speed of car as much as possible so that it can have greater momentum to perform a cooler drift, meaning that collecting up-to-date data quickly became more important. Once the detected distance from the wall was reached, we would move on to the next state.
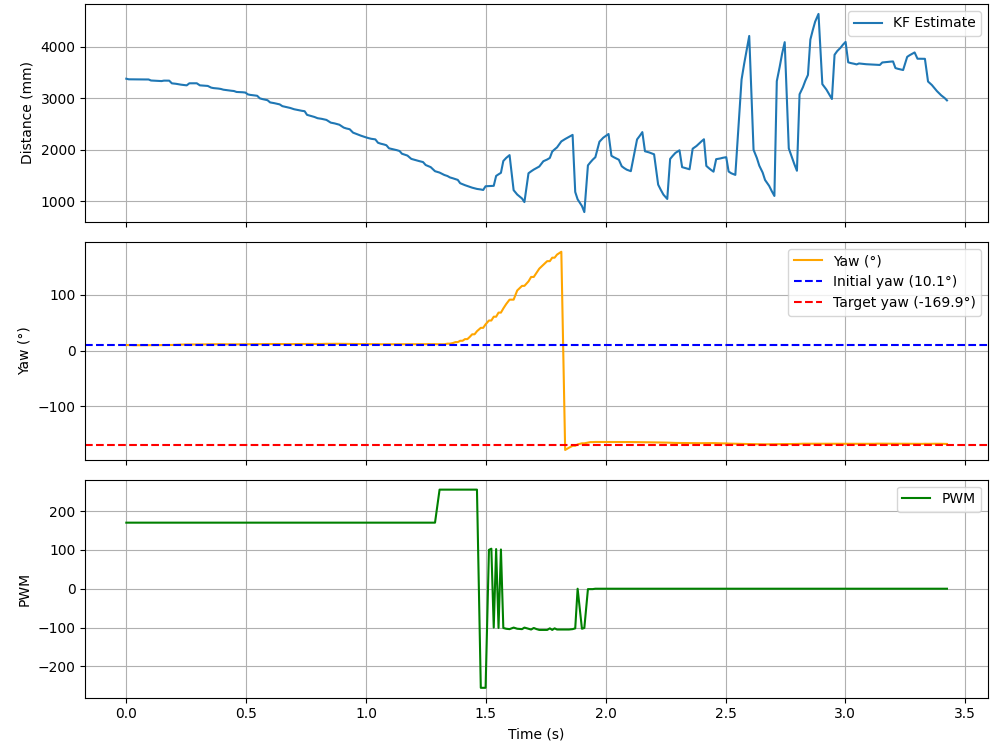
It should be noted that due to the speed the robot carries, the drift stunt actually "initiates" at a threshold distance of 1600 mm due to the car otherwise risking collision with the wall. The drift itself occurs well within the three foot range set in the instructions.
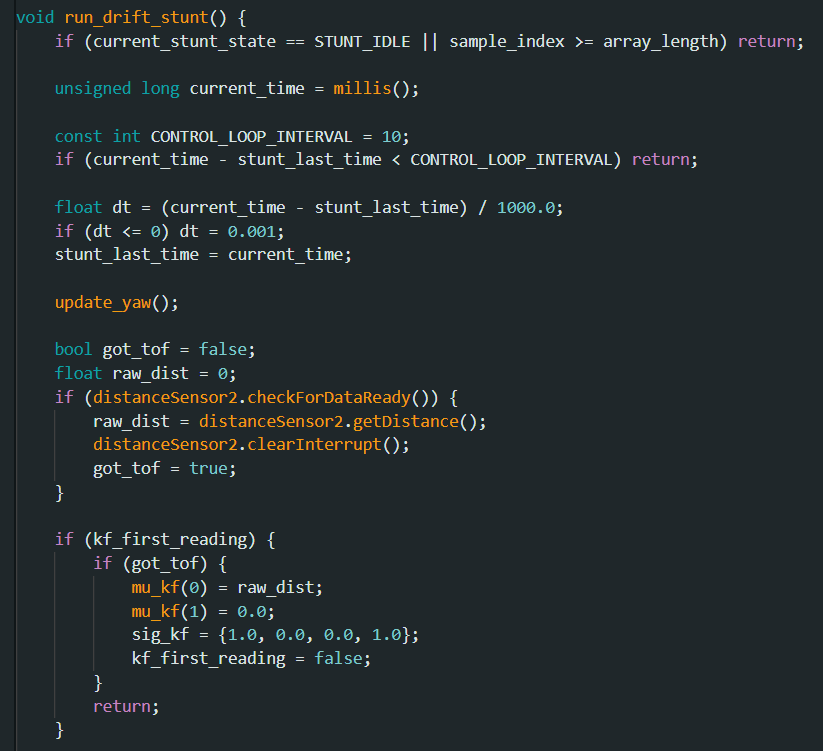 Helper function used in the main loop that houses the main FSM.
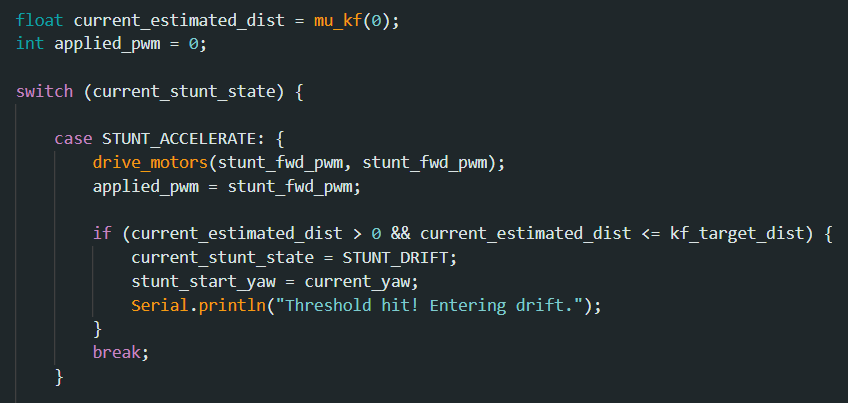 The robot accelerates towards the wall until it passes a certain threshold.
Drifting
The next part was slightly trickier, which was to get the car to turn and make a clean 180 degree turn. Using the same techniques from Lab 6 we could get a pretty accurate idea of the car's orientation, so the first approach was to simply make the car turn until it hit 180 degrees from the initial orientation that it approached the wall with. However, the car's angular momentum meant that it would consistently overshoot by a significant margin, and trying to lower the turning angle produced inconsistent results. Consequently, we needed to reuse the orientation PID control we developed in the previous lab to ensure that when the car would turn it would consistently stop at our desired angle of 180 degrees regardless of slight variations.
In the end, the turning phase was split into two different states: STUNT_DRIFT and STUNT_RECOVER, with the former being where the car turns by a fixed amount and the latter where the car makes up the difference using the orientation PID logic we had developed in the previous lab. Once the car reached the desired angle, it would then simply drive away. After some testing, it was discovered that Kp = 0.0425 and Kd = 0.02 yielded strong and smooth results. Additionally, setting the fixed turning amount for STUNT_DRIFT to a low number like 20° worked well as going higher would tend to cause overshooting since the motor pwm values during this state are set to the maximum of 255.
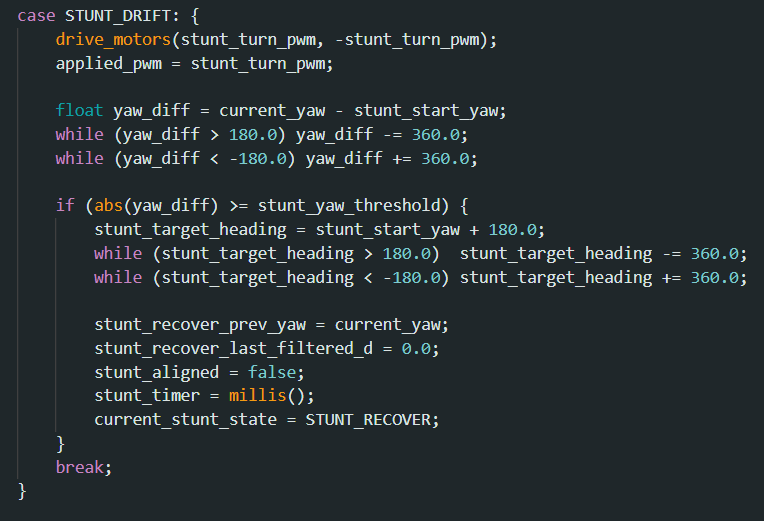 Simple turning phase of the drift stunt.
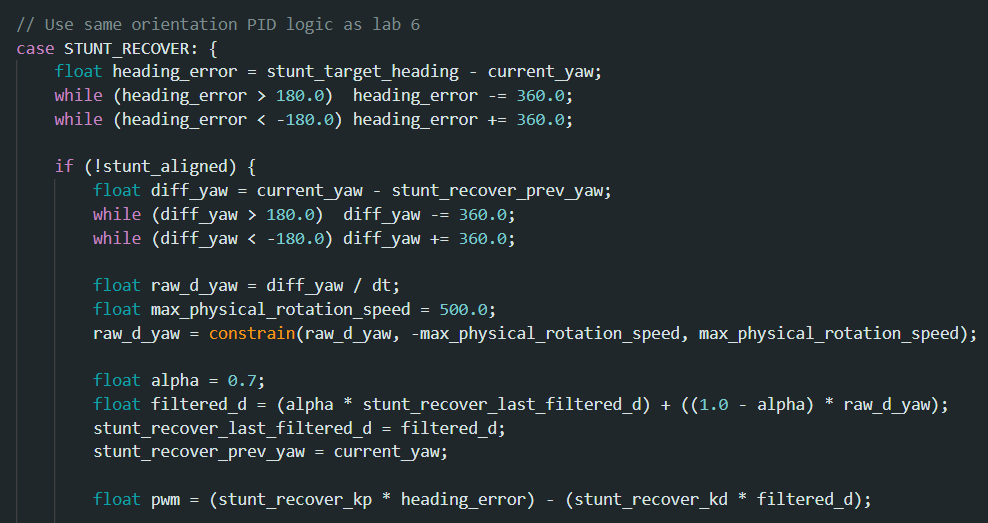 Orientation PID aligns the car to 180 degrees and then drives off.
After the stunt is completed, we enter the STUNT_DONE state, where all the relevant data is sent back to the Python side for plotting.
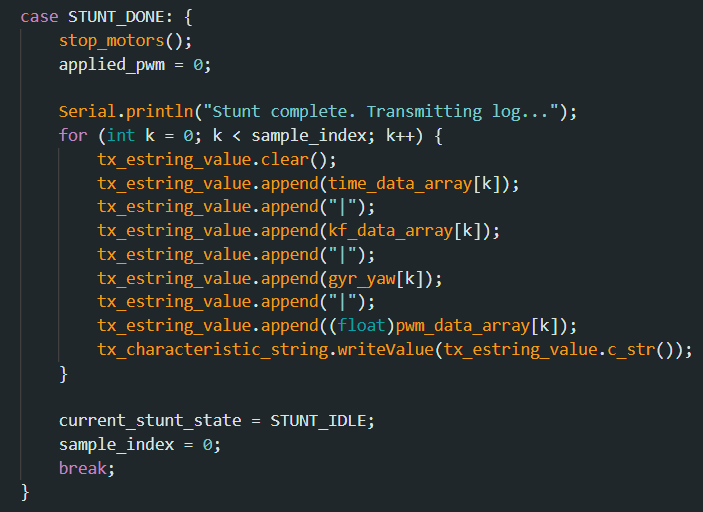 End state where the relevant data is sent.
Video Results
Below are three different videos showcasing the car's drift stunt shot from different angles. Also shown are their relevant data plots.
Run One
Wide angle of the drift stunt.
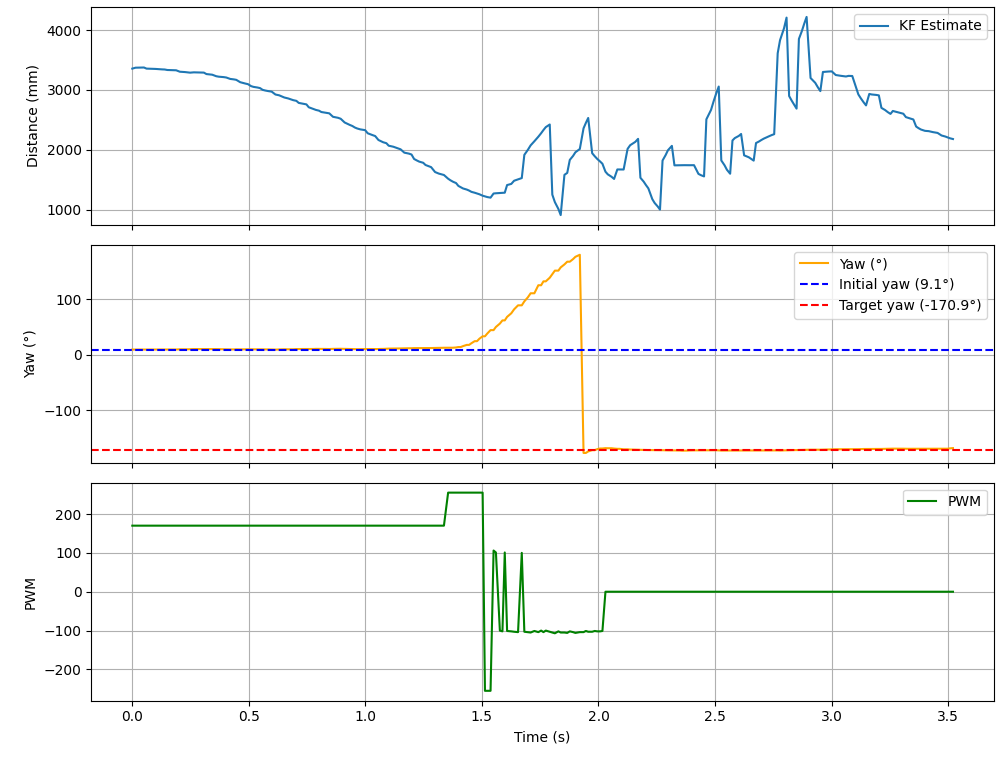 Data plots for run one.
Run Two
Medium angle of the drift stunt.
 Data plots for run two.
Run Three
Close angle of the drift stunt.
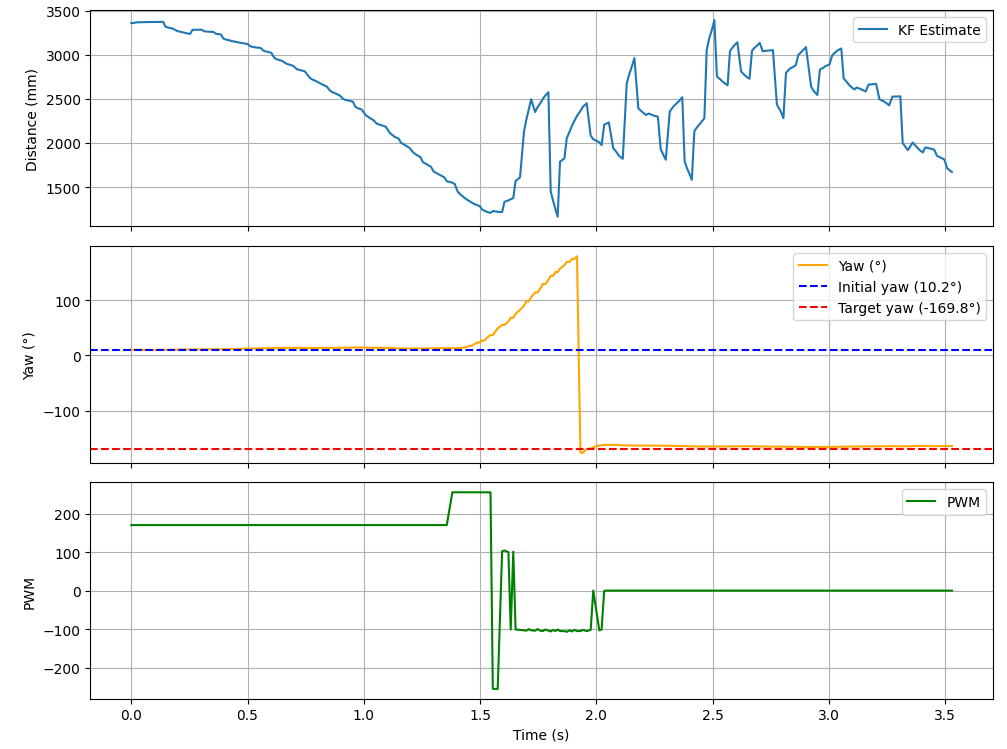 Data plots for run three.
Below is a blooper video of a two-for-one stunt: a drift followed by a flip!
Two-for-one car stunt.
Overall, this lab was very useful in applying all the concepts and work that we had done in the previous labs, and it was cool to integrate all of those ideas into one stunt.