Lab 1A: The Artemis Board
In this first lab, we get to set up the Arduino IDE and Jupyter notebook to familiarize ourselves with the Artemis Nano microcontroller, testing its various sensors and functionalities.
1. Prelab & Setup
We started by installing the SparkFun Apollo3 boards manager in order to select the Artemis Nano as our target board and access the necessary example code.
2. Blink
Running the "Blink" example in the Arduino IDE flashes the Artemis Nano's onboard LED on/off every second.
3. Serial Monitor
Running "Serial" from the Apollo3 example code, which demonstrates the board's ability to communicate with the PC. This specific example echoes user input back to the terminal.
4. Temperature Sensor
Running "analogRead" from the Apollo3 example code, we can test the Artemis Nano's onboard temperature sensor. As seen in the video below, when placing my finger on the board, the temperature reading increases.
5. Microphone
Running "MicrophoneOutput" from the PDM example code, we can read data from microcontroller's onboard microphone. As seen in the video below, the reading increases when humming at a higher frequency.
Lab 1B: Bluetooth Connectivity
In this part of the lab, we established Bluetooth Low Energy (BLE) communication between the PC and the Artemis board. On the Artemis side, the ArduinoBLE library is used to advertise the board as a BLE device and define a custom service for sending and receiving data. On the computer side, communication with the board is handled through a Jupyter notebook using the Bleak Python library.
To ensure a consistent and isolated Python environment, a virtual environment was created and all required dependencies were installed within it, including Bleak and JupyterLab. This prevents version conflicts and ensures compatibility with the BLE libraries used in the lab.
To connect to the correct Artemis board, the board’s Bluetooth MAC address must be identified. Running the provided ble_arduino.ino sketch causes the Artemis to print its MAC address to the serial monitor at startup, which is then copied into the connections.yaml configuration file used by the Python code.

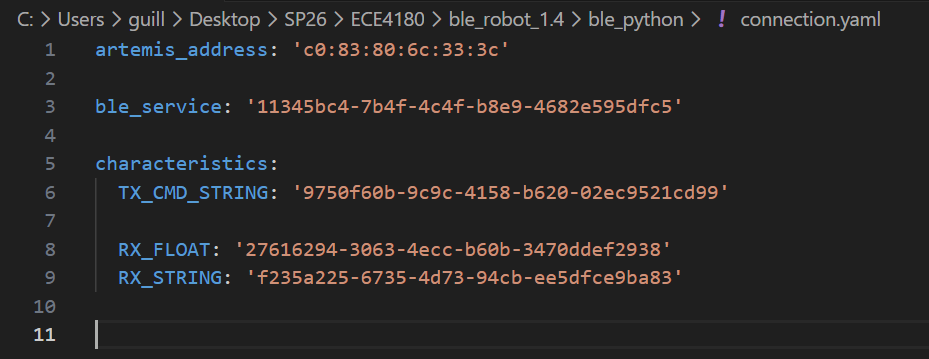
In addition, a unique UUID was generated in Python and assigned to the custom BLE service on both the Arduino and Python sides. Matching these UUIDs ensures that the computer connects only to the intended BLE service on the correct device.
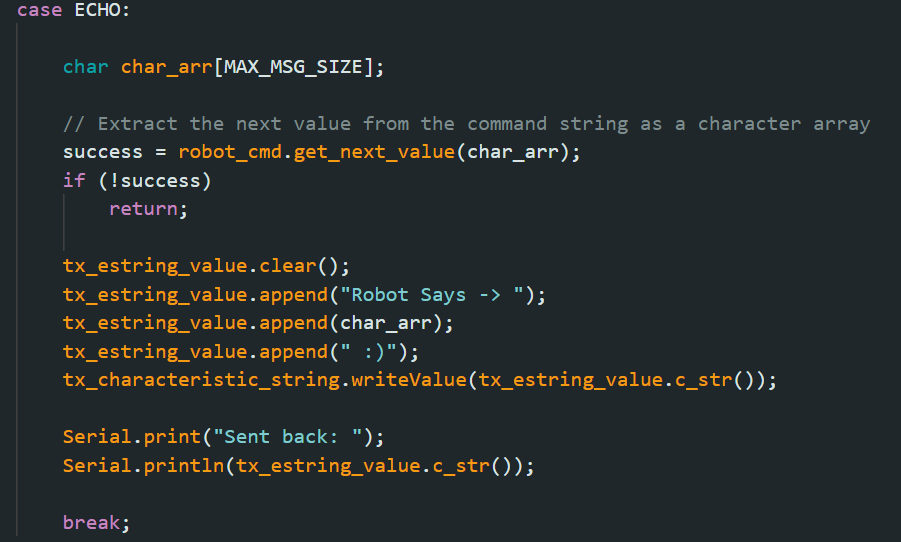
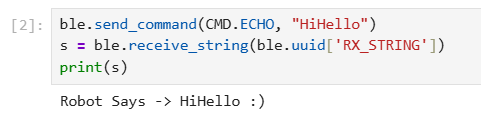
1. ECHO Command
The ECHO function in this task receives a string from the PC, modifies it, and then sends it back.
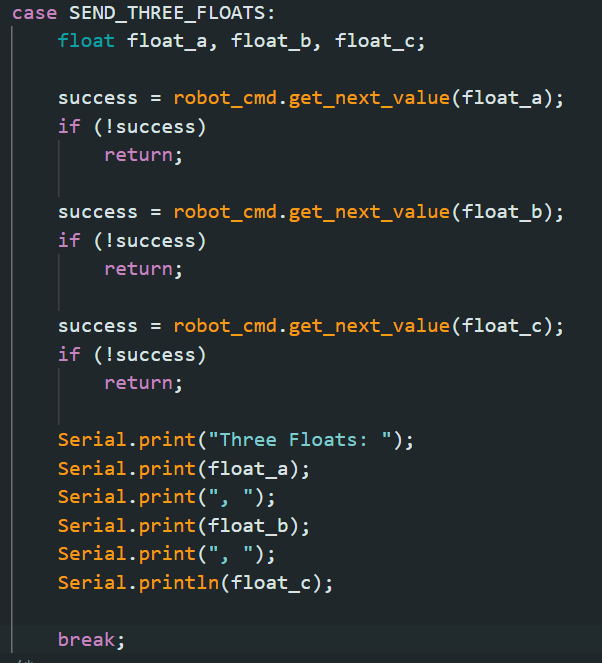
2. Send Three Floats
The SEND_THREE_FLOATS function extracts three float values from one message through using "|" as a delimiter character.


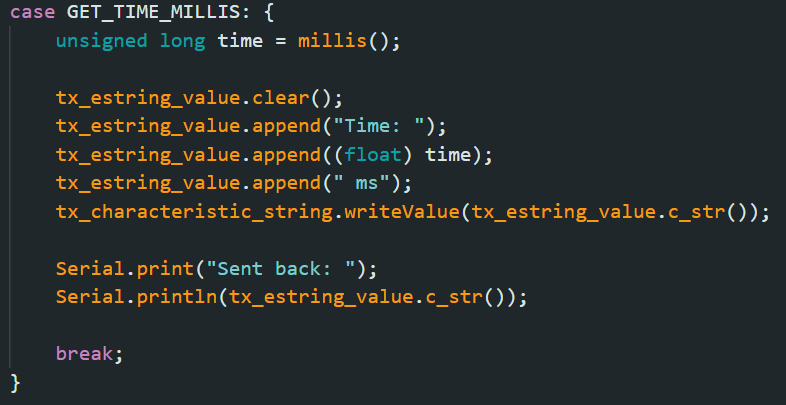
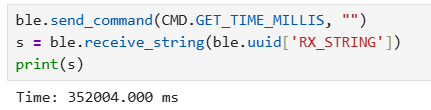
3. Get Time Millis
The GET_TIME_MILLIS function collects the time elapsed since boot in milliseconds using millis().
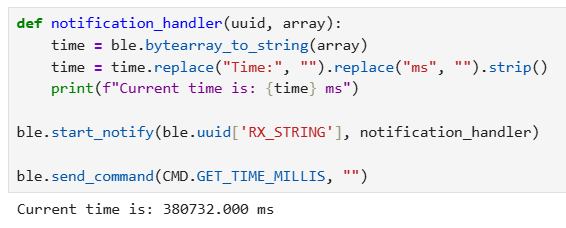
4. Notification Handler
A notification handler is setup in python to parse and print the time string automatically.
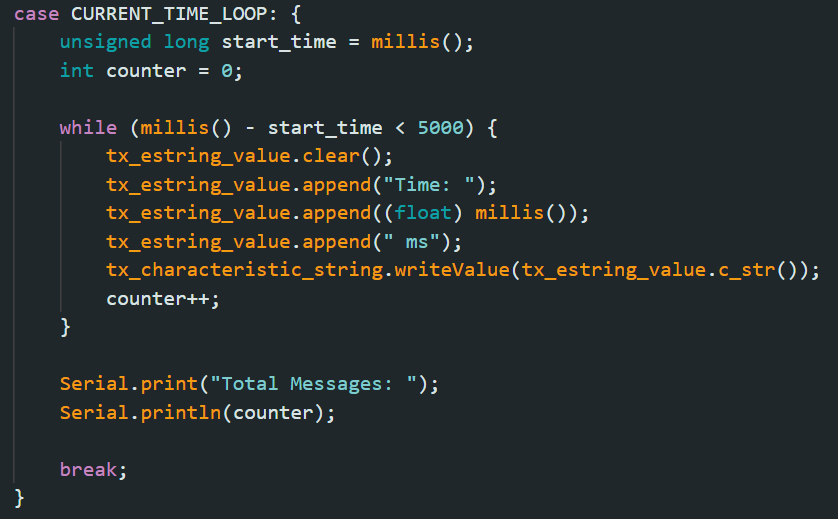
5. Data Transfer Rate
By creating a loop which runs GET_TIME_MILLIS for 5 seconds, we can test the effective data transfer rate by counting the number of messages sent. The data transfer rate can be calculated as (Total Bits Sent / Total Time). If each message is formatted as such: Time: 808176.000 ms, that is 19 characters, or 152 bits (8 bits/char), per message.
Given a total of 291 messages sent, the data transfer rate is:
(152 * 291) / 5 = 8.85 kbps

6. Send Time Data
A global array was created which could be filled first and then sent as a batch to the PC. The data would be sent in bulk once the array's limit was reached. The time stamps of the first and last pieces of data were recorded in order to calculate the new data transfer rate of 1000 entries / (146673 - 146641 ms) of 31,250 messages/second.
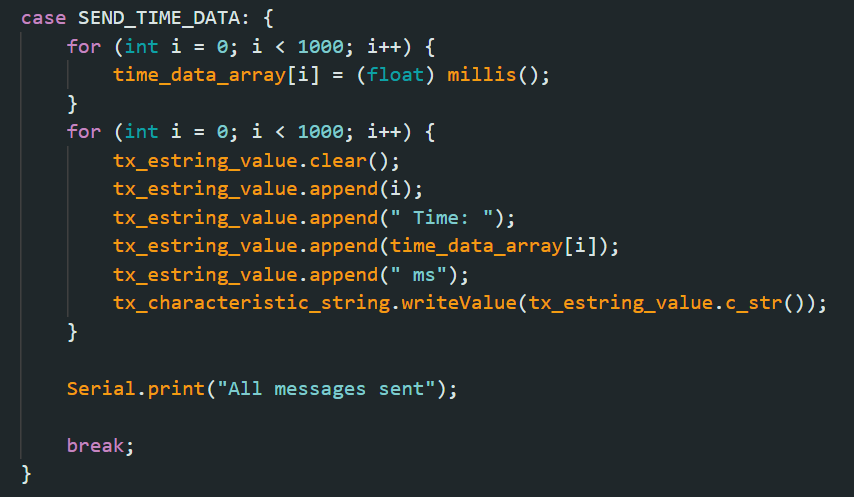


Given 152 bits per message, this leads to a transfer rate of around 4.75 Mbps which is several orders of magnitude greater than what was found using the previous method.
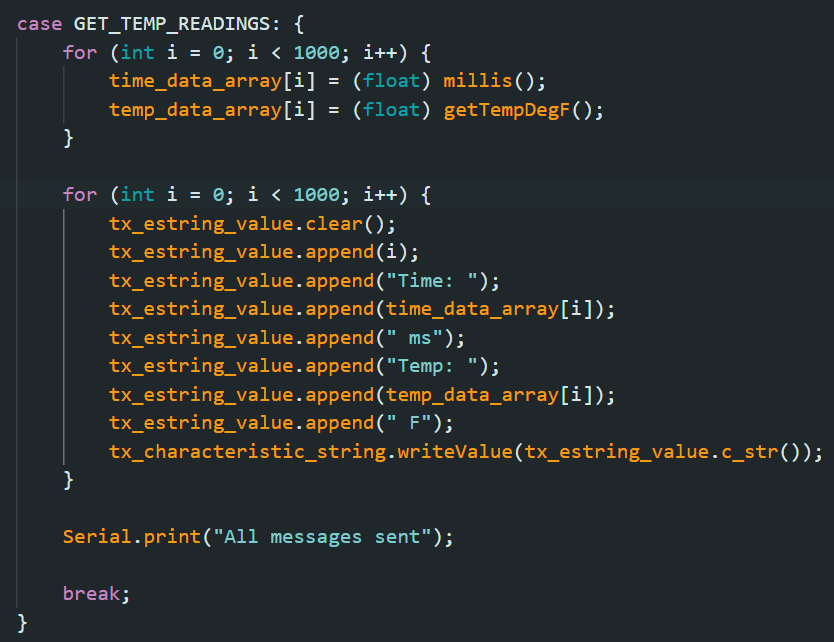
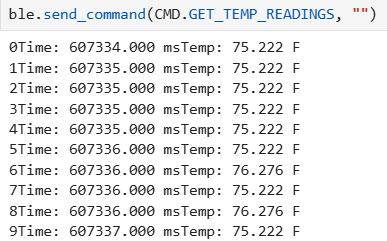
7. Get Temp Readings
Similar to the previous task, another global array was created, this time to store temperature recorded by the board, and then sent concurrently with the time.
Discussion: Data Transfer Methods
Single Value Transfer
Simple to implement, but suffers from low data transfer rates due to the overhead of individual transmissions (computer sends command -> board processes -> sends response).
- Rate Achieved: 8.85 kbps
- Best For: Immediate feedback, low volume data.
Batch Value Transfer
More complex as it requires memory management on the Artemis, but significantly higher throughput as communication overhead is reduced.
- Rate Achieved: 4.75 Mbps
- Best For: High-precision measurements, logging, large datasets.
Given that each reading is 19 bits, and the Artemis board has 384 kB of RAM, we can store roughly 165,566 readings in memory at once. This allows sending large batches of time and temperature data without exceeding memory limits.
Conclusion & Discussion
The most challenging part of the lab was getting accustomed to the setup and learning how to work with Bluetooth communication between the Artemis board and the computer. Once we became familiar with the workflow, we were able to successfully send and receive data, both single values and in batches. Overall, the lab taught us how to use the Artemis board with BLE, handle data transfer in Python, and implement methods to efficiently log and process sensor data. It also highlighted the trade-offs between simple, low-rate communication and higher-throughput batch transfers.